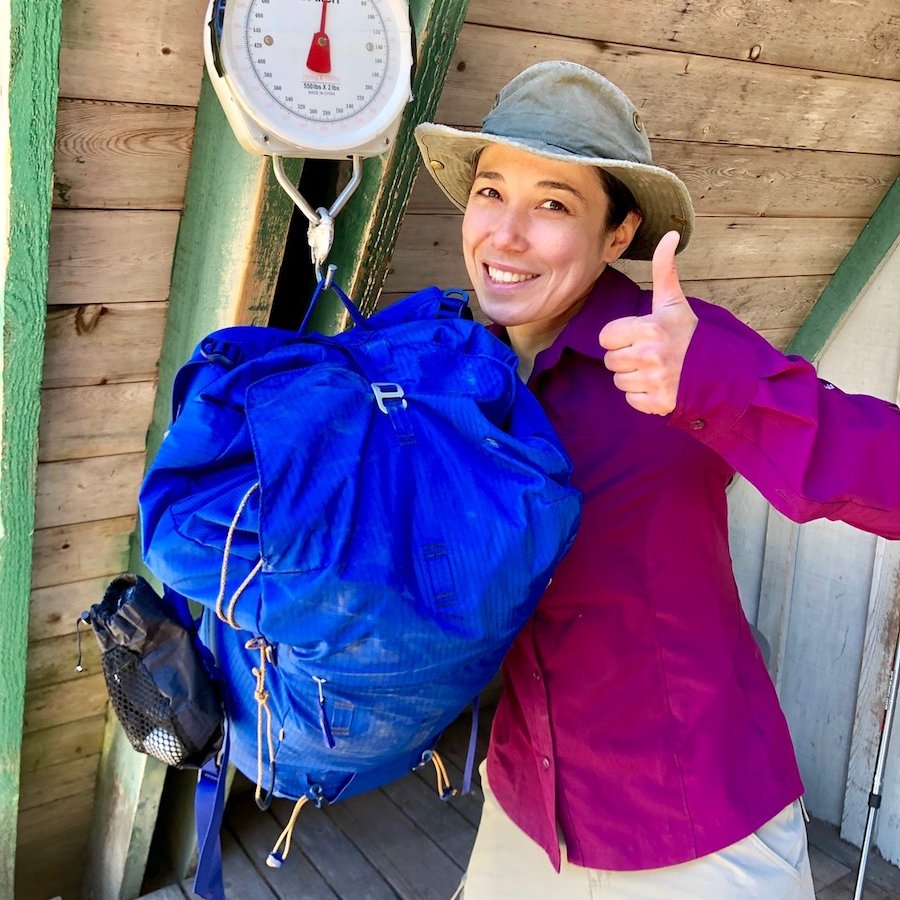
I recently completed my thru-hike of the West Coast Trail on Vancouver Island, hiking all 75km, North to south in 71 hours, by myself as a solo hiker. To do this, I decided I wanted to go ultralight with my pack weight. For those of you who have never heard of this, it means having a base pack weight of under 10lbs, not including consumables (food, water, and fuel).

Over the past several months, I have been researching various pieces of gear, deciding what I would use of the things that I already had and what things I would invest in to lower my pack weight. I've tested different items and set-ups, and weighed everything that's going in my pack with a kitchen scale. I am now confident it my list and my comfort level with the gear in that list, and my pack way is now a respectable ultralight weight of 9.4lbs, but with all things I need to be fully comfortable on the trail. This blog post will go through all my choices in detail.
Shelter
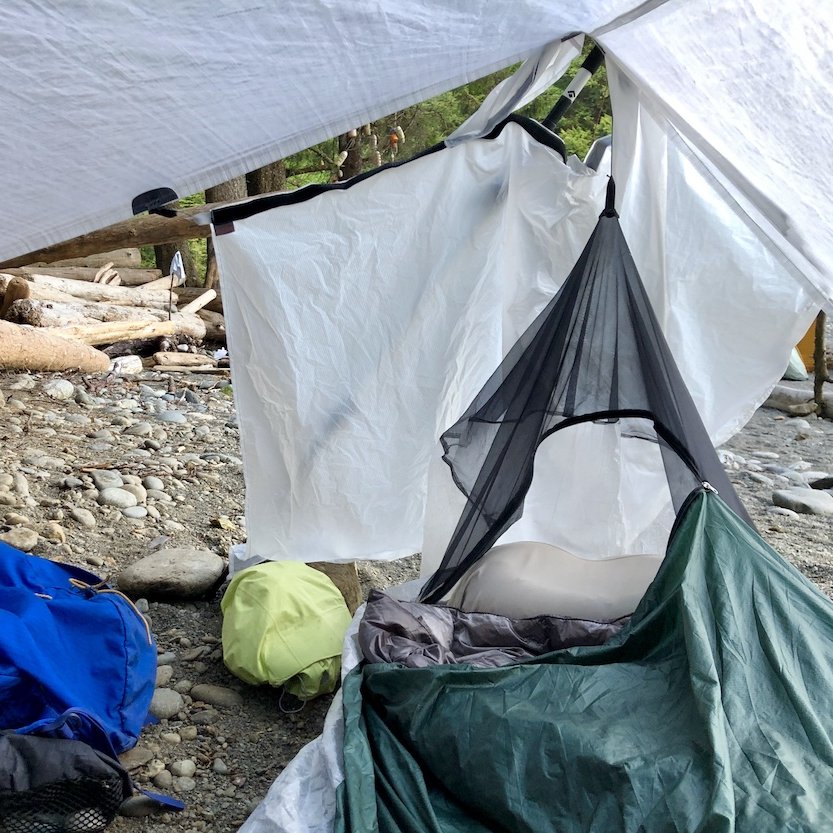
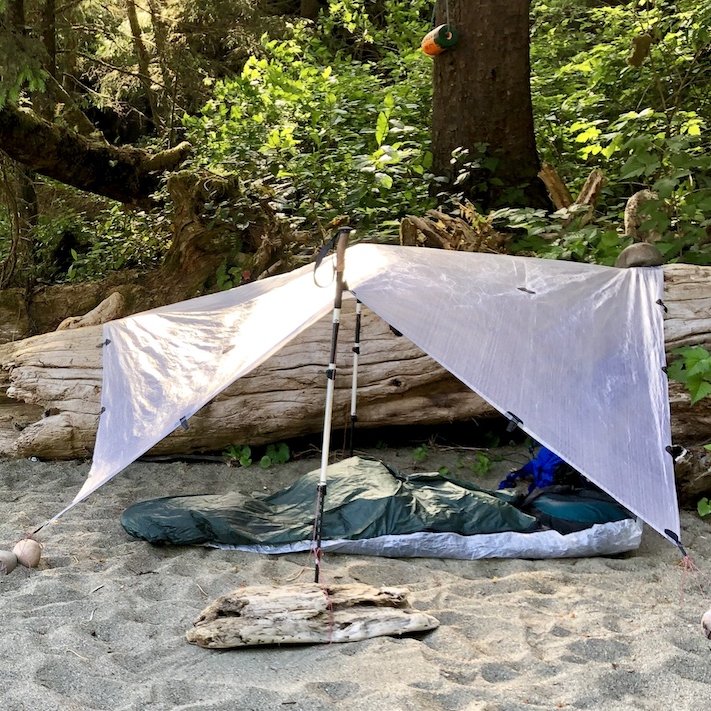
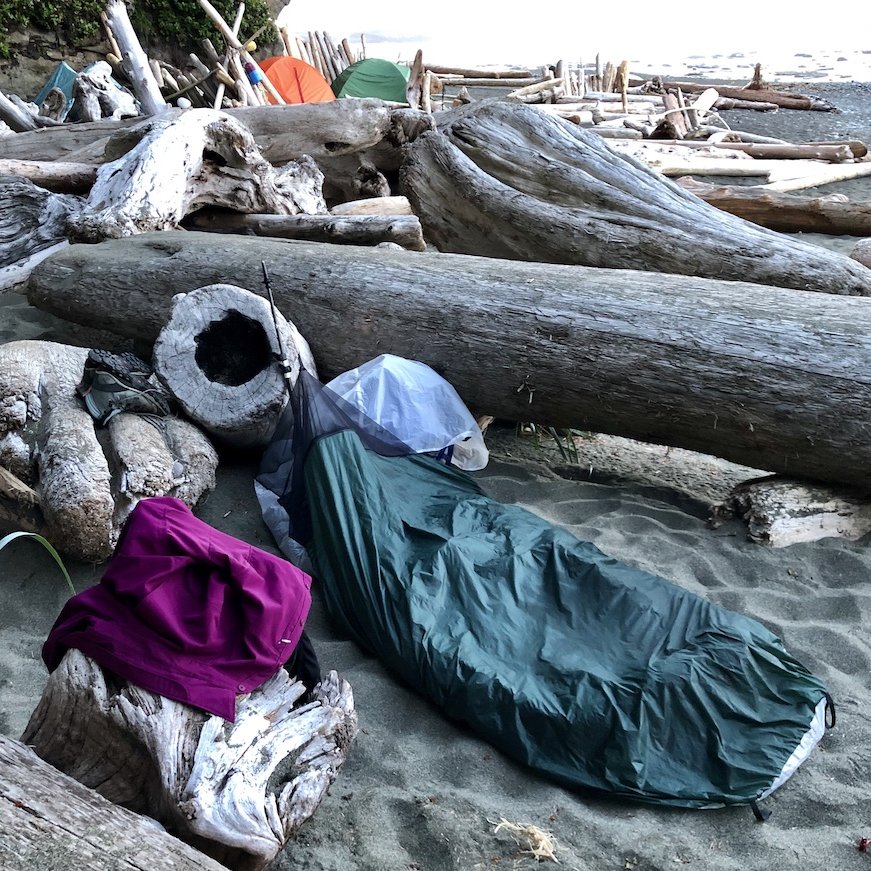
- Borah Dyneema Bivy in small dyneema
stuff sack: 122g/4.3oz - Etowah Outfitters Dyneema 8x8.5 Tarp and MSR guy lines (one cut in half, tensioned removed): (1x8’, 1x8’ 4x4’): 177g/6.2oz
- Peg Bag [Naturehike Aluminum stakes](https://amzn.to/2KmUYNx x3), Titanium hook stakes x3): 54g/1.9oz
TOTAL: 353g/12.5oz
After pouring through all the various options out there for ultralight shelters, I decided to go with a Dyneema tarp and bivy system. The way I looked at it, you get more space, ventilation and outdoor exposure, with less weight on top of that and at a lower cost. The above system is 120g lighter than the lightest 1-person Zpacks tent, the Plexamid. It's also over $100 USD cheaper. If I had gone for a smaller tarp, it would have been even cheaper, but I decided I wanted the space and flexibility to be able to use it as a 2-person tarp shelter.

Once you learn all the different knots, there are tons of different ways the tarp can be set up for different needs and conditions. The down side is that there is a learning curve. You have to learn the knots really well so you can do them quickly and under pressure, like when weather conditions are sub-optimal, but I'm always up for learning new things. More about this in my blog post Gearing Up for a Long Backpacking Trip: My Approach to Trail Readiness. That being said, you can simplify things when you're really tired and the weather is clear by doing what they call "cowboy camping" and just use the bivy sack, like I did on my first night.

Sleep System
- Double Black Diamond Down Quilt with foot box made with hair elastic ($20 USD at Costco): 432g/15.2oz
- Aegismax Down Booties: 53g
- Thermarest Uberlite Mattress - Regular: 253g/8.9oz
- Naturehike U-shape Inflatable Pillow: 47g/1.7oz
- Flextail Gear Battery Pump: 174g/6.1oz
TOTAL: 906g/2lbs
It took a little trial and error to figure out the best ultra-light set-up, especially not knowing exactly what the weather would be like in the unpredictable Pacific Northwest coastal rainforest in late spring. I had originally thought I might even bring a quilt, and just use my Thermarest Neoair XTherm in my bivy and wear my down hoody, down pants and down socks for warmth. I tried it out. I was warm enough, but only barely. I also didn’t like the feel of only having a thin layer of sil-nylon on top of me to “snuggle” into, making for a more fitful night's sleep.
I then switched to my Nemo Siren 30 Sleeping Quilt paired with my Thermarest Neoair Uberlite, which would have been fine, though a little heavier. But then as the weather forecast started to firm up as I got closer to the date they were predicting highs in the low 20s (Celsius), lows of 9-11 and only a 20% chance of rain across the board. This opened up a lighter option, using my lighter down blanket that I picked up at Costco. It doesn't have the straps and snaps that seal out the cold like the Siren quilt, but with consistent warmer temperatures on the horizon, I figured I could get away with it, and if it got cooler, I still had my down hoody jacket, and merino wool hat I can throw on for extra warmth. The weather prediction then shifted one last time the morning I left and temperatures were going to be slightly cooler. In the end, I threw in my pair of down booties hoping it would be just enough to bridge the gap if it got cold at night. I was glad I did. The second night dropped lower and we hit dew point. Even with the down booties I was a little cold at night, but I survived.

Now I've tried a number of lightweight camping pillows, including more expensive ones, but I haven't found one I liked better than the Naturehike $12 U-shaped pillow I found on Amazon. I find it give just the right amount of support in the right places for someone who is predominantly a side-sleeper like me. It's also the lightest one I have seen at only 47g. I use my neck gaiter as a pillow case to make it just a little more comfortable.
With the added weight savings from the quilt and pillow, I felt that I could afford to upgrade my stuff sack mattress pump to a USB rechargeable one for an extra 60g. Knowing that I might be setting up camp fairly late both nights, I thought I would really appreciate the luxury of a quick and easy set-up.
Pack
- Blue Ice Warthog 45L Pack, size small (with modifications): 710g/25.1oz
- Zpacks Shoulder Pouch (x1): 14g/0.5oz
- Aquaclips (x2): 19g/0.7oz
TOTAL: 724g/1.59lbs
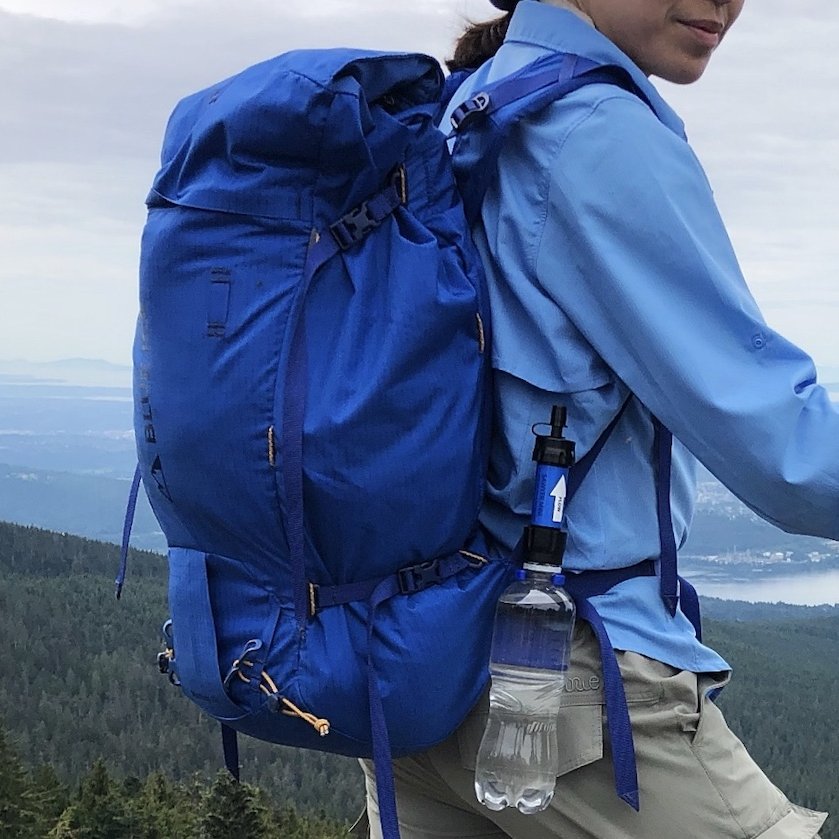
I didn't realize I was looking for a new pack for backpacking until I tried on the Blue Ice Warthog 45L pack. It was technically designed as a climbing pack, and can be used to handle much heavier loads (as in the climbing ropes for which it was designed), but it can easily be adapted into a lightweight backpacking pack. I swapped out the padded belt for the simple webbing belt, removed additional heavy duty ice axe loops and helmet holder. I also cut off excess webbing ends that are way longer than I need. Since the compression straps are removable in design, I decided to take two of them off, not really needing them.

I like that it doesn't have pockets for water bottles as I have never been able to access them without enlisting a hiking partner's help anyway. I just picked up a couple of inexpensive Aquaclips and hang my plastic bottle off the back of my hip belt, but hey are somewhat fragile (one of them snapped on the trail). I did, however, miss having some sort of pockets in the front, so I picked up a lightweight shoulder pouch from ZPacks to go with it, to carry a bit of trail mix and some hydration tablets so they would be easily accessible on the trail.
The pack is supposed to be fully waterproof, but I know that even waterproof stuff can wet out if rained on long enough, so I did wrap my quilt in a garbage bag and used a dyneema stuff sack with my down jacket for extra insurance. I do have a Etowah Dyneema Pack Cover (small) that's only 28g as well, but decided not to bring it since the weather was looking so favourable.
Camp Kitchen
- Esbit Titanium Stove: 15g/0.5oz
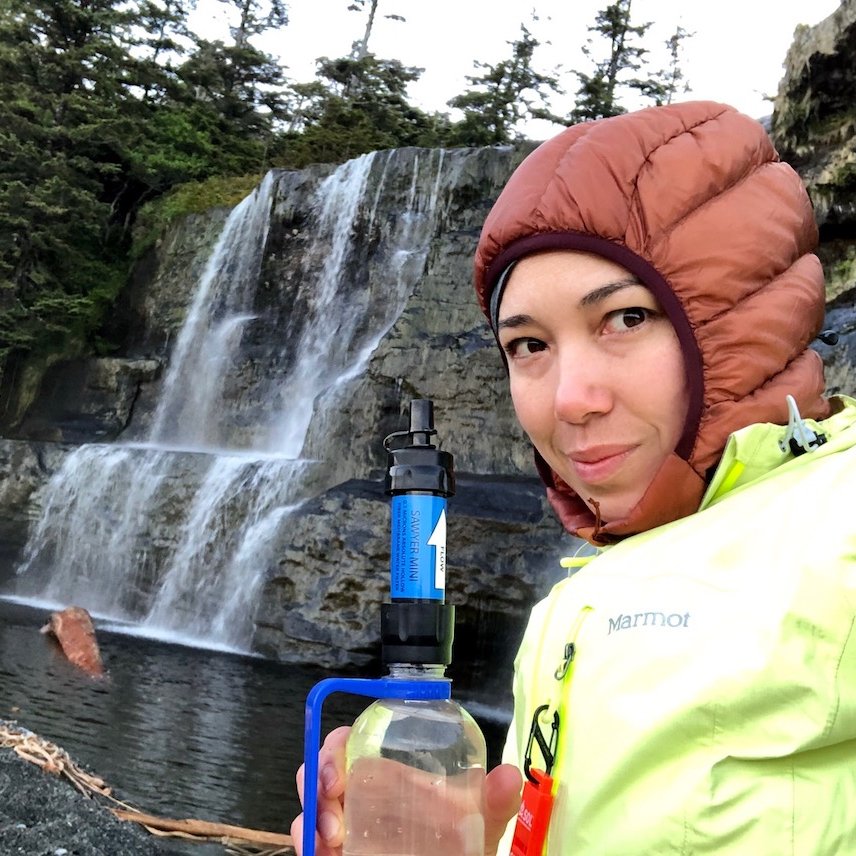
- Sawyer Squeeze Mini (filter only): 50g/1.8oz
- Two 500ml Propel Bottles with SmartWater Sport Cap: 50g/1.8oz
- One light plastic water bottle: 11g/0.4oz
- Modified McFlurry Spoon (from McDonald's): 5g/0.2oz
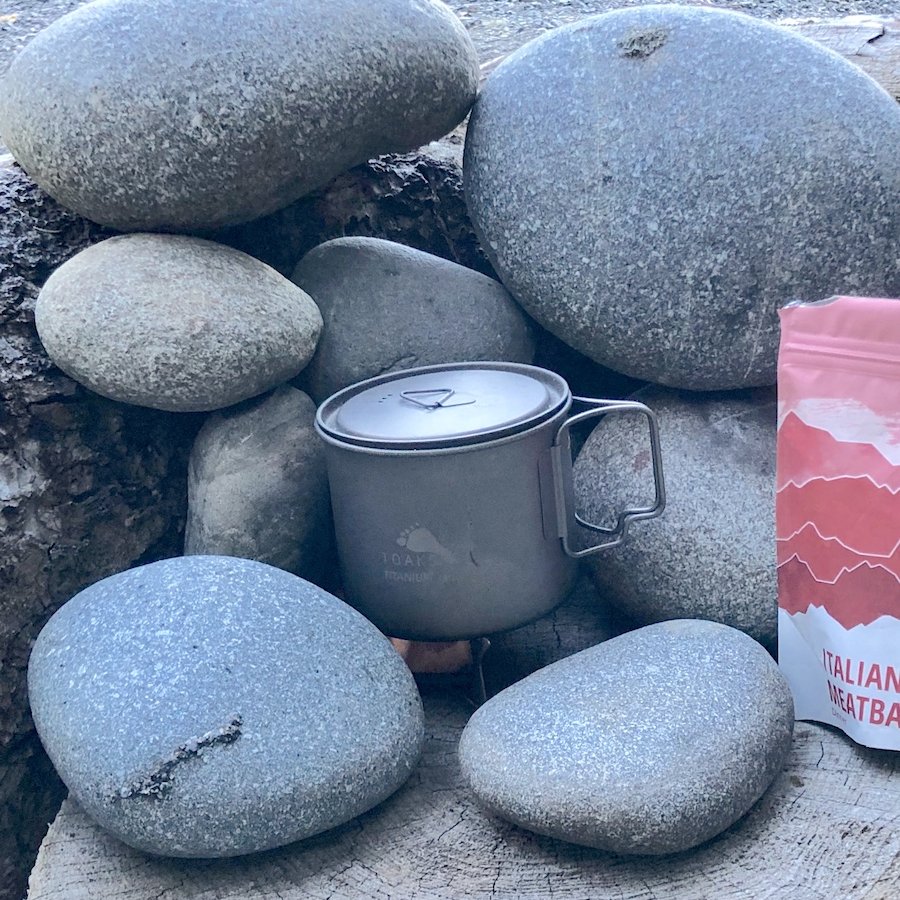
- Toaks 550ml Titanium pot & lid with Zpacks Pot Stuff Sack: 101g/3.6oz
- Snow Peak Hot Lips: 3g/0.1oz
- Small Bic Lighter: 10g/0.4oz
- Coghlan Waterproof Matches & Striker: 3g/0.4oz
TOTAL: 248g/8.8oz
Nothing has really changed here from my trip to the Howe Sound Crest Trail last year, other than that I picked up a Sawyer Squeeze Mini for my filter to go a bit lighter. Using recyclable plastic bottles is still the lightest option for carrying water and the ones I had, like SmartWater bottles, work with my filter, so I didn't need to bring squeeze bags. I also picked up some silicon hot lips so I could use my pot for hot drinks instead of having to bring a cup. The Esbit titanium stove that uses fuel cubes is perfect for shorter solo trips so you only have to bring exactly the amount of fuel you need with no waste in terms of carrying unnecessary weight. I could have brought my titanium wind screen to use with my stove since in windy conditions, it can be hard to light the fuel cubes, but I managed to make it work by using rocks and logs as a natural wind screen.

Clothes (Carried)
- Zpacks Vertice Rain Mitts: 19g/0.7oz
- Lixada Rain Kilt: 68g/2.4oz
- Marmot Essence Rain Jacket: 160g/5.6oz
- Arcteryx Cerium LT Hoody Down Jacket (in a large Dyneema stuff sack): 270g/9.5oz
- Montbell Super Merino Wool LW 130mg merino shirt: 102g/3.6oz
- Montbell Super Merino Wool LW 130mg merino leggings: 93g/3.3oz
- Smartwool Merino Sport 150mg Beanie: 24g/0.9oz
- Injinji Liner Socks: 31g/1.1oz
- Teko Organic Midweight Hiking Socks: 57g/2.0oz
- L-Run Water Shoes: 128g/4.5oz
TOTAL: 952g/2.1lbs
Lots of new stuff here! I decided I needed waterproof overmitts that were more breathable so that I wouldn't overheat while using them as I hike, but still keep out the wet so that I wouldn't soak through to the bone and get a chill. I have my synthetic sun gloves as an extra layer of insulation to wear underneath them if temperatures drop. Since I knew I was likely to need to wear long gaiters, I figured a rain kilt would be a practical piece that was lighter weight and would allow for more airflow while I'm hiking as opposed to rain pants. I ended up getting a cheaper sil-nylon kilt on Amazon because it was a fraction of the price of the ZPacks dyneema kilt, better sized for a smaller person, and slightly lighter to boot. As for my rain jacket, I stuck with my Marmot Essence since it's only 21g heavier than the ZPacks Vertice Jacket.

I wanted to be completely prepared for the rain being spring in the Pacific Northwest rainforest, but I got lucky and it didn’t rain even once! I don’t regret bringing that stuff though. Even without any rain in the week leading up to my hike, there was still mud on the trail and if it had rained, it would have been really muddy. This area can be pretty changeable in terms of weather, so it’s important to be ready. I only really used the jacket in the end which I used for an extra layer of warmth and to cut the wind in the evening since it didn't rain. I did, however, end up using the kilt as a privacy screen at the entrance of my tarp shelter one night. Another benefit to the kilt over rain pants.
For my warm layers, my new Arcteryx Cerium Hoody is a significant upgrade from the heavier but less insulated Columbia down jacket I used last year. I. I figured I could get by with my lighter Montbell baselayer top (130mg merino wool) when combined that down jacket so I took my lighter weight baselayer top, while using my 200mg Icebreaker leggings for a little extra warmth around my lower half at night. And while I do own a pair of lightweight, water-resistant Skinners for camp shoes, the weather forecast is going to be warm and it's not showing any rain, so I figured I could get by on my lighter weight water shoes instead.
Clothes/Gear (Worn/Hand Carried):
- Nonwe Convertible Quick-Dry Cargo Pants
- Columbia Silver Ridge Convertible Shirt
- Ex-Officio Give-N-Go String Bikini Underwear
- Ex-Officio Give-N-Go Travel Bra
- Coolibar UPF 50 Sun Gloves
- Zpacks Calf Gaiters
- Columbia Neck Gaiter
- Tiley Endurables T3 Wanderer Hat
- Naturehike Mosquito Head Net (in hat pocket)
- Injinji Liner Socks
- Smartwool Hike Medium Crew Socks
- Salomon Quest 4D 3 Gortex Hiking Boots
- Cascade Mountain Tech Carbon Fiber Hiking poles
- Sunglasses (from The Dollar Store)
- Wooden turtle necklace
I decided that I really don't care about looking stylish on the trail and prefer to have the most functional clothes, so I picked up a pair of quick-drying cargo pants that convert into shorts. It took a bit of digging though since most outdoor stores seem to think women want a snugger fit and less pockets, but I managed to find a decent pair on Amazon that fit well. I got a slightly lighter, breezier Columbia PFG Tamiami Convertible Shirt for hotter weather hiking, but in the end went with my Columbia Silver Ridge convertible hiking shirt because it was a bit thicker to cut the wind better, since the daytime highs were only going to be 15-18C and it can be windy on the coast to boot. Any time you can double-purpose your clothes, it's an ultralight "win" like with my pants that convert into shorts and my shirt that converts into a short-sleeve shirt. My Ex Officio Give-N-Go underwear and travel bra are modest enough to double as swim wear for bathing and are super quick to dry, eliminating the need to bring clothes just for jumping in the streams to rinse off.
Last year, I used the Outdoor Research ActiveIce fishing gloves for sun protection on my hands, but I lost one on the trail. I picked up these cheaper Coolibar sun gloves on Amazon, but they're pretty cheaply made. I have had to re-sew split seams 3 times since I got them. I'll keep using them until they're shot anyway. Other than, they work okay for me.
I converted over to the new Injinji liner toe socks for my liner socks now. I thought they would seem heavy or bulky, or possibly even too warm, but the extra fabric between the toes seems to keep my toes drier thereby keeping them cooler, while offering extra blister protection between the toes as well.
I like to wear some sort of light pendant as a totem for luck and to reinforce certain personal characteristics when on a solo backpacking adventure. For this trip, I chose my wood carved sea turtle necklace that I got in Mexico on my honeymoon. Turtles are symbolic of self-pacing, staying grounded, determination, persistence, emotional strength, ancient wisdom and luck, all of which come in handy on a longer thru-hike. Wearing a turtle as a totem is said to encourage the wearer to take a break in their busy lives and look around or within themselves for more grounded, long-lasting solutions. This a great theme for my trip as I will be going back to my stunt career and all-round busy life soon after.
Health, Safety, and Micellaneous
- Petzyl E+Lite (modified): 22g/0.8oz
- First Aid Kit: 146g/5.2oz
- Toiletries Bag: 70g/2.5oz
- Gear Repair Bag: 37g/1.3oz
- Spyderco Dragonfly2 Knife: 54g/1.9oz
- Storm whistle & Nite-Ize S-Biner: 9g/0.3oz
- Mini Compass: 5g/0.2oz
- REI Multi-towel Mini (just towel): 15g/0.5oz
- License, Visa, $50, camera instructions: 18g/0.6oz
- Anker Battery, 4" charging cable (in bag): 187g/6.6oz
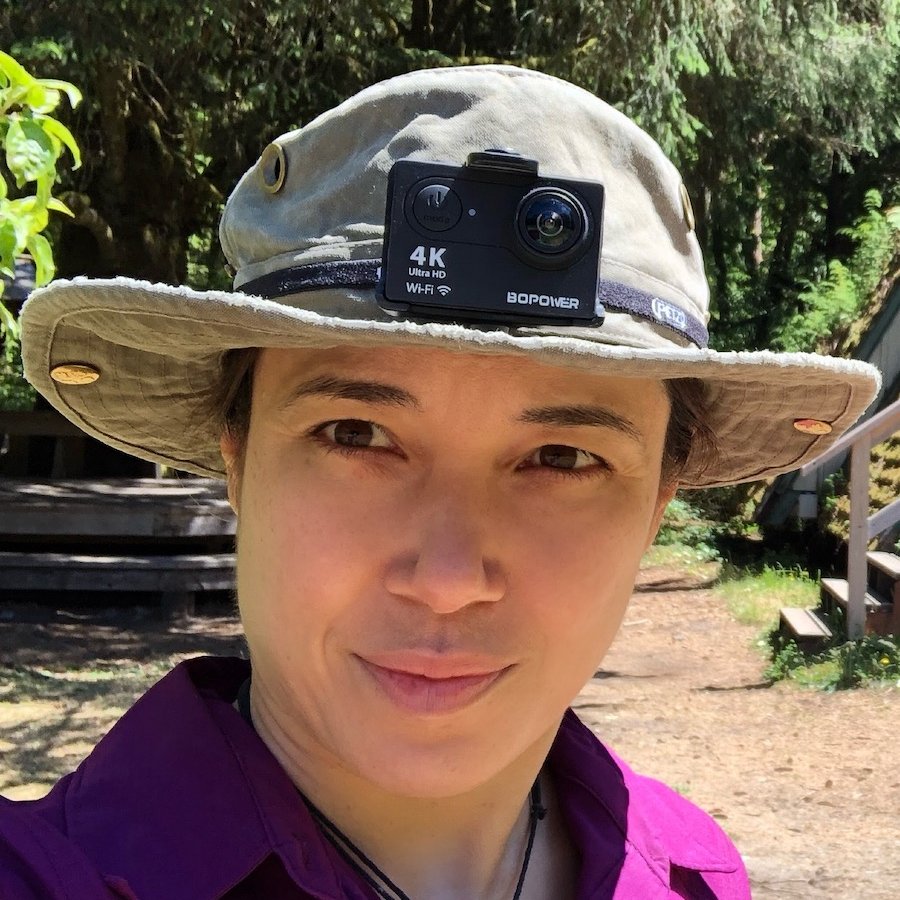
- Action camera, remote and clip: 109g/3.9oz
- Pedco Ultrapod Camera Tripod: 53g/1.9oz
- iPhoneX & case: 224g/7.9oz
- Garbage bag: 11g/0.4oz
- S.O.L Tinder Quik Firestarters(x3): 2g/0.1oz
TOTAL: 962g/2.13lbs
More new stuff in this section! I went for the ultralight Petzl E+lite for my headlamp, which uses a tiny watch battery for its LED light. I also picked up a my new Spyderco DragonFly2 after learning how important a locking blade is in a knife, as many knife cutting accidents in the field happen as a result of using non-locking blade. It also makes it more effective as a weapon against animals should it come to that. My new REI towel is lighter than my old micro-fibre towel, just as absorbent, but quicker drying, making it an easy swap in my mind.
My action camera (a GoPro knock-off I picked up on Amazon) is a new addition as well in my "luxury" category. I decided I wanted to take video footage and be able to take photos without draining my phone battery too much, so I decided to bring it since its more battery efficient and would save me from having to bring a second USB battery to keep my phone charged. For the most part, I just clipped my camera onto the strap of my headlamp which I wore over my Tilley hat and just pushed the button on my remote every time I felt like rolling camera and getting some video on the go. I also picked up a lighter weight tripod that also has a strap allowing it to be attached to tree branches etc. I didn't even end up burning through the juice in my Anker battery. It's amazing how long the iPhone's battery can last when you you're not using it constantly. ;)

One last little luxury I decided to bring a 3 tiny tinder quik fire starters. Since the weather is dry, if I have enough time, I might enjoy having a fire on the beach, or help other people on the trail to start one. For only 2g, it was a no-brainer. For the most part, I joined other people's campfires, but on the morning after it had dipped down to dew point and I had gotten chilled, I was glad I brought them since I was the only one there and up to start a fire.
Bear Hang System
- Waterproof Sil-nylon Roll-Top Bag: 44g/1.5oz
- Coghlan 12" Odor-Proof Bag: 26g/0.9oz
- LiteOutdoors Dyneema Guyline: 54ft: 37g/1.3pz
- Zpacks Rock Stuff Sack: 4g/0.1oz
- ZPacks Mini-D Carabiner: 3g/0.1oz
TOTAL: 114g/4oz
My intention is not to have to hang my bear bag as most of the sites have food storage lockers, but they sometimes fill up, and there's always a chance of getting stuck in between campgrounds, so it's good to have a bear hang kit just in case. I kept mine simple and light, using a ZPacks stuff sack along with dyneema guyline and a mini carabiner. I did, however, use the sil-nylon food stuff sack that came with the Selkirk Designs Bear Hang Kit, which I already had and is only 10g heavier than the ZPacks Big Food Bag. I will be doing a review on their full system in the near future. I didn't end up using the bear hang at all though as there was plenty of space in the bear lockers even at the busier campgrounds.
FINAL BASE PACK WEIGHT: 4259g/9.38lb
TOTAL PACK WEIGHT (with Consumables): 17185g/5.82lbs
The Benefits of Going Ultralight When Backpacking
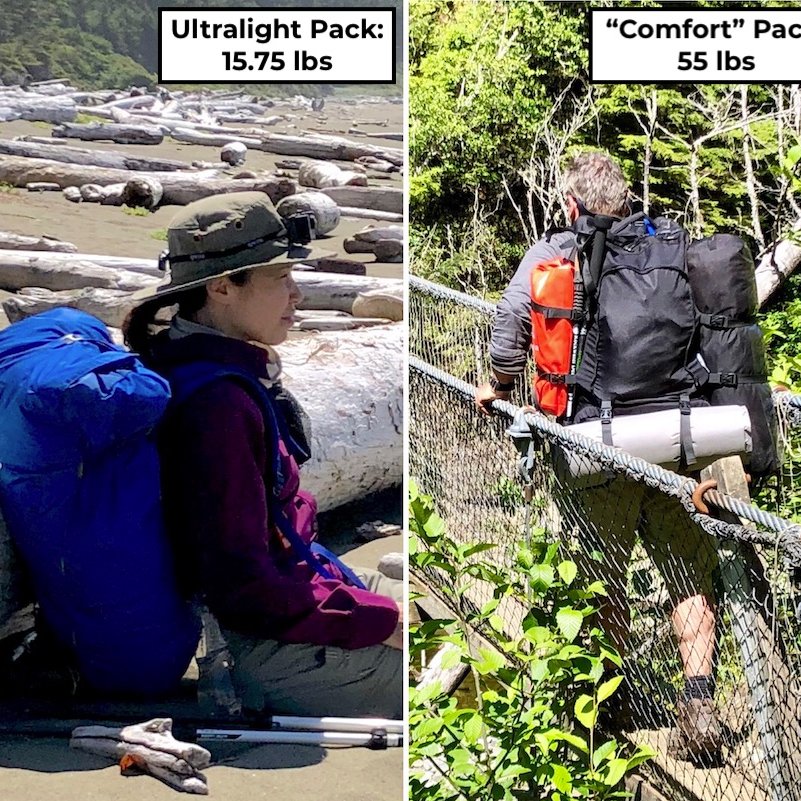
Everyone was always so surprised when they saw my pack on the trail. Most people were sporting packs weighing 40-60lbs. Even after adding my food, water and consumables (more detail on this tomorrow), I was only carrying 15.74lbs. The advantages of having this light a pack became quickly apparent on a trail like the West Coast Trail. There are 100 ladders on the trail, some of which are in sets to make for several stories of ascent and descent up and down river gorges, and without any safety harnesses to boot. There are also a few steeper inclines on the south end of the trail. People with heavier packs had to take the ladders really slowly, stepping two feet up to each and every rung. I was able to go up the ladders normally, with minimal pausing to catch my breath.
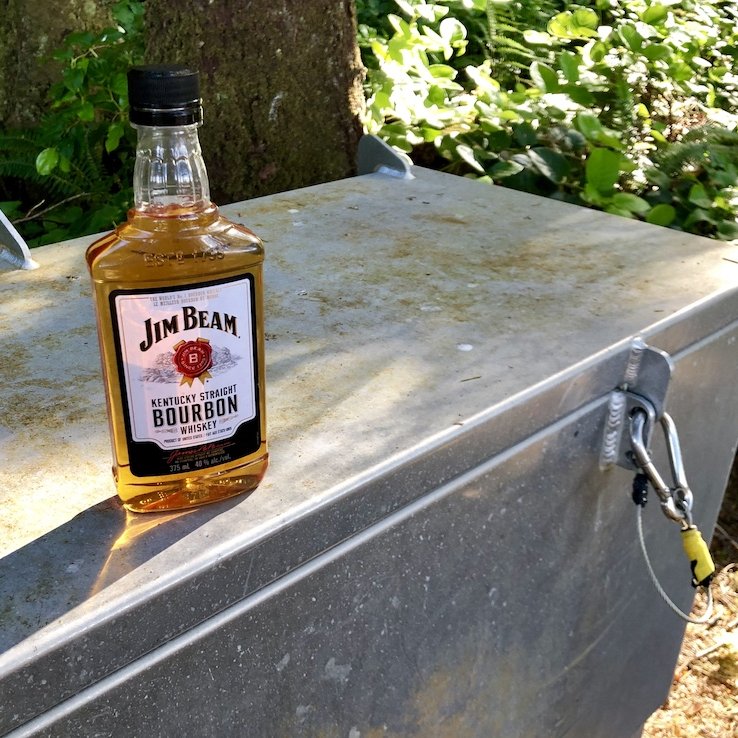
Having less stuff on the trail also means less stuff to manage when you get to camp. It's easier to keep everything organized and find things you're looking for. Also, there is something freeing about carrying less stuff. It shows you how little you really need in life to survive. Also, it leaves you space for the unknown, like the mickey of bourbon I scored at the Bonilla Point campground (more on that on in a later blog post).

For some, going full-on ultralight is just not financially practical though. The costs of all that dyneema (ultralight waterproof fabric) adds up. But even if you can't afford new gear, there are lots of ways you can pair down your pack without having to invest in new stuff. I used the book Ultralight Backpackin' Tips: 153 Amazing & Inexpensive Tips For Extremely Lightweight Camping for ideas. But here is a great online tip list on lightening your pack for backpacking.
I hope this helps you generate ideas for what you want to carry on your back for your next backpacking trip. I will be uploading a video showing all my gear on YouTube as well, if you want to see what it all looks like. I'll post it on here too as soon as it's up. If you have any questions or comments on the my ultralight solo backpacking gear list, please hit me up in the comments for this blog pots. I am always game to hear other great ideas that I may not have thought of too! :)
