
Having made a keto-friendly version of haupia, and enjoyed it thoroughly, I decided to try the more traditional carb-based version so as to have a tropical treat to enjoy on a warm and sunny carb-up day. I created my own gluten-free version of sweet potato haupia squares, incorporating a crust using cassava and arrowroot flours as a base. It has a lovely combination of contrasting textures and flavours making it a memorable dessert to serve at your next luau or just to enjoy as a healthy carb-up snack or dessert.
Vegan Carb-Up Sweet Potato Haupia Squares Recipe
Crust Ingredients:
- ½ cup cassava flour
- ½ cup arrowroot flour
- 1 tablespoon vegan vanilla protein powder
- 2 tablespoons Lakanto granulated monk fruit sweetener
- ¾ teaspoons glucomannan
- ⅛ teaspoon fine sea salt
- 3 tablespoons extra virgin coconut oil, softened
- 2 tablespoons unsweetened coconut milk beverage (*Or any non-dairy milk.)
- 1 teaspoon pure vanilla extract
- 1 tablespoon unsweetened shredded coconut
Crust Directions:
Preheat oven to 350F with the rack positioned in the centre of oven. Spray an 8″x8″ square cake pan with cooking spray and set aside. In a food processor or large mixing bowl, combine flours, protein powder, sweetener, glucomannan and salt.
Add coconut oil and mix (or pulse or cut with pastry cutter) until crumbly. Add coconut milk beverage and vanilla and mix well. Mixture will be sandy, not sticky. Gently press mixture into bottom of the prepared pan. Sprinkle unsweetened flaked coconut on top and press into crust.
Put in the oven and bake for 16-18 minutes or until golden. Set aside while you make sweet potato filling.
Sweet Potato Filling Ingredients:
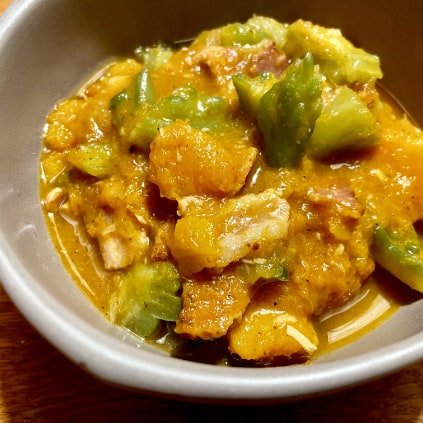
- 2 cups baked or boiled sweet potato (orange or purple yams), cooled and skins removed (*I find that baking them gives a better flavour. Purple yams would be more traditional, but orange also works all the same, just a different colour.)
- 1 tablespoon psyllium husk, soaked in 3 tablespoons water
- 3-4 tablespoons Lakanto granulated monk fruit sweetener (to taste)
- ¼ teaspoon fine sea salt
- 1 teaspoon pure vanilla extract
- ½ cup unsweetened coconut milk beverage (*Or any non-dairy milk.)
Sweet Potato Filling Directions:
In a large mixing bowl, beat the sweet potato to break it up for around 10 seconds (they should already be very soft.) Add psyllium husk, sweetener and salt, and beat to combine. Slowly add vanilla and coconut milk beverage. Mix well until fully incorporated, around 1 minute.
Pour sweet potato mixture into prepared crust, smoothing the top with a spatula, and bake for 30-35 minutes or until surface begins to brown. Remove from oven and cool on wire rack for about an hour before starting on the haupia topping.
Haupia Topping Ingredients:
- One 14oz can full-fat coconut milk
- 5 tablespoons arrowroot flour
- ¼ cup Lakanto granulated monk fruit sweetener
- ½ cup water
- ¼ teaspoon coconut extract (*optional)
- 1 tablespoon unsweetened shredded coconut, toasted
Directions:
In a small bowl, whisk together arrowroot flour and water. Mix till the cornstarch is completely dissolved. Set aside.
In a small saucepan over medium heat, whisk together coconut milk and sweetener. Keep whisking until it's just about to boil.
Slowly pour in the arrowroot flour/water mixture while continuing to whisk. Turn the heat to low and simmer for 10-15 minutes. You'll want to stay close the whole time, and whisking frequently. Remove from heat when the haupia has thickened to an almost gluey consistency, and it starts to pull away from the side of the saucepan as you whisk.
Pour haupia mixture evenly onto sweet potato filling. Allow to cool on the counter, around 15 minutes. Make room in fridge so there’s plenty of room for air to circulate around the pan. Chill at least 4 hours, but overnight is best. Cut into 16 squares and sprinkle with toasted coconut to serve.
Did you make this vegan carb-up sweet potato haupia bars recipe? If so, how did it go? Please share your thoughts in the comments. Or if you share pics of your creations on Instagram, please tag me so I can see them. Enjoy! :)