Stand aside, gingerbread houses and charcuterie boards! There's a new contender for coolest Christmas party centrepiece, the charcuterie chalet! After seeing various permutations of this cool concept on Instagram, I decided to give it a shot. Below are the photos and the ingredients I used for my design. I'll also add some other things I had meant to try but ran out of time or space. I'll also talk about the challenges of working with this format.
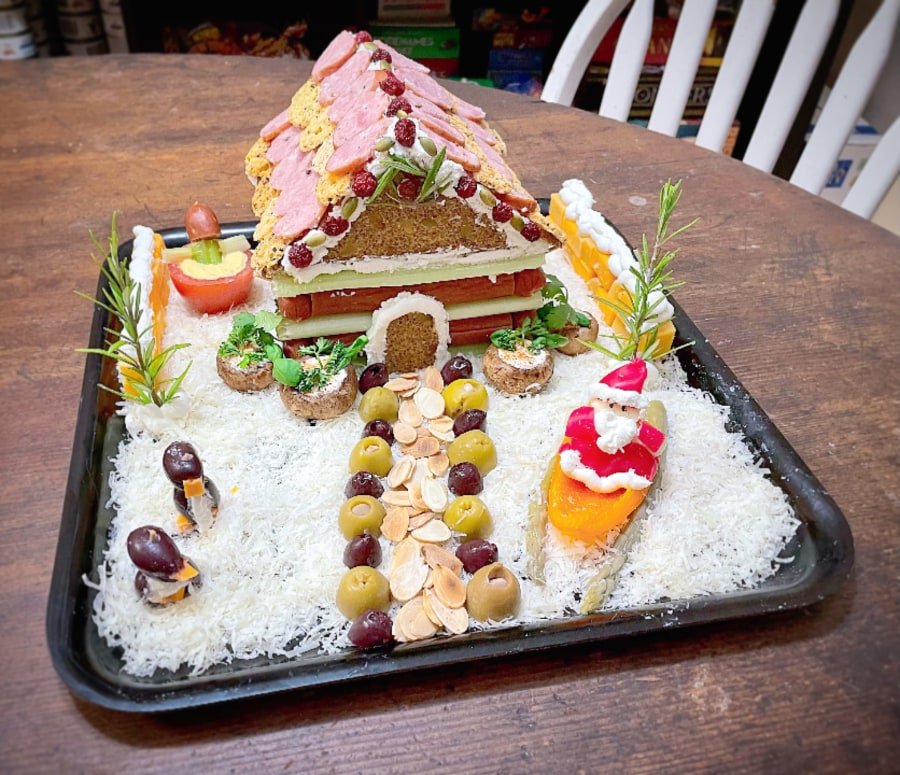
My Charcuterie Chalet Build Concept:
Charcuterie Chalet Ingredients:
- Roof: Nut and seed crackers, two pieces 10 x 14cm
- Front and back roof pieces: Nut and seed crackers, two pieces 10 x 8 x 8cm
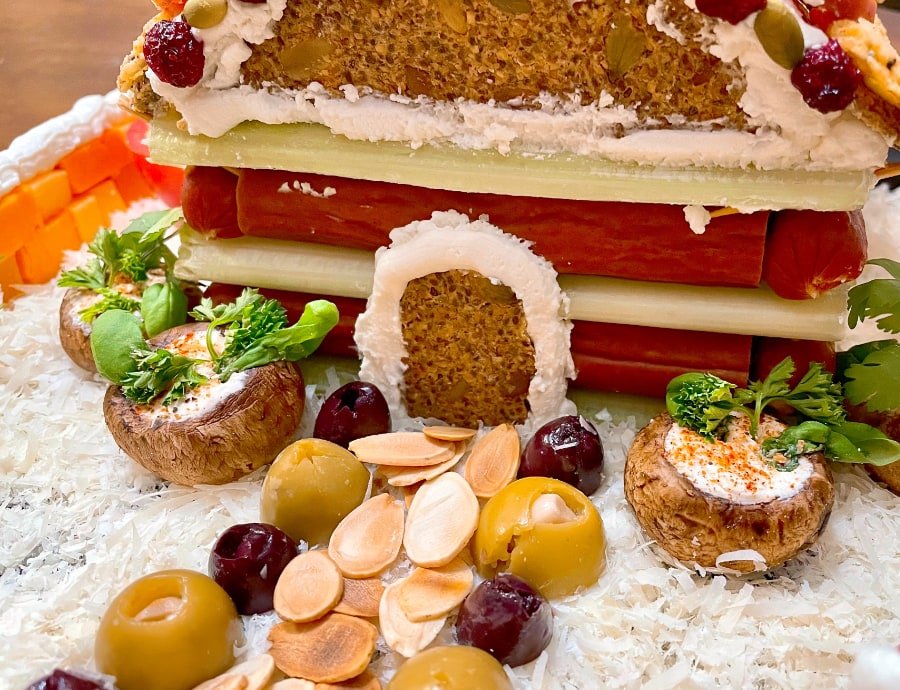
- Walls: 8 turkey pepperoni sticks, 12 celery stalks, halved lengthwise cut to same size as pepperoni sticks (toothpicks used to hold them together).
- Door: Nut and seed cracker
- Shingles: sliced kielbasa and Parmesan crisps
- Mortar: 3 oz soft goat cheese brought to room temperature, mixed 2 tablespoons non-dairy milk (*May swap with softened brick cream cheese with no added milk. Use a piping bag for application.)
- Exterior decoration: roasted pumpkin seeds, dried cranberries
- Wreath: Rosemary and dried cranberry
Yard and Exterior Decoration Ingredients:
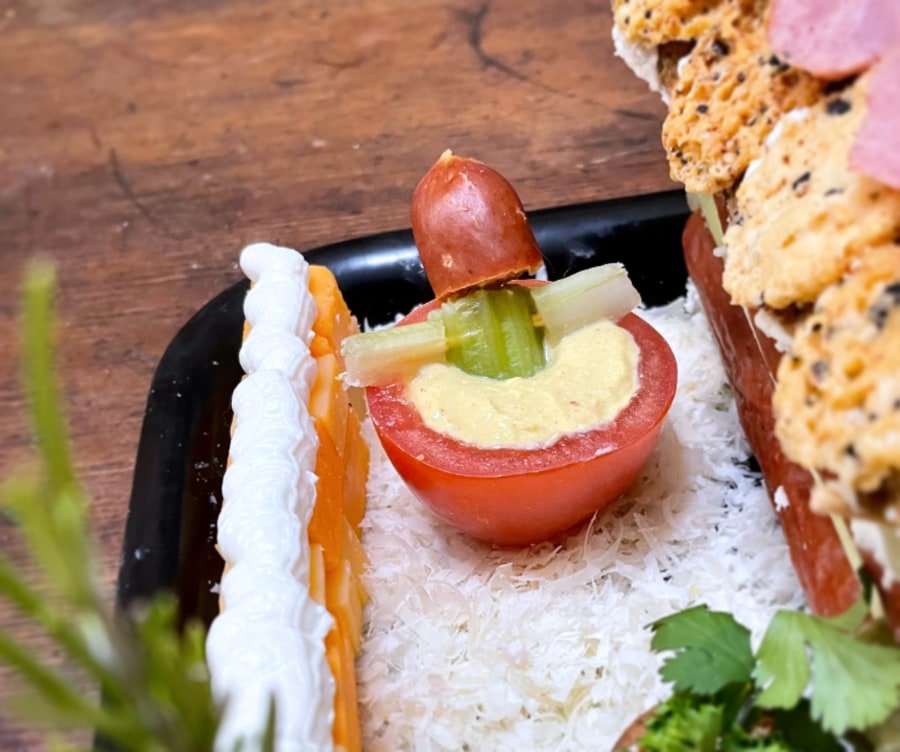
- Brick wall: Cheese cubes topped with mortar for snow.
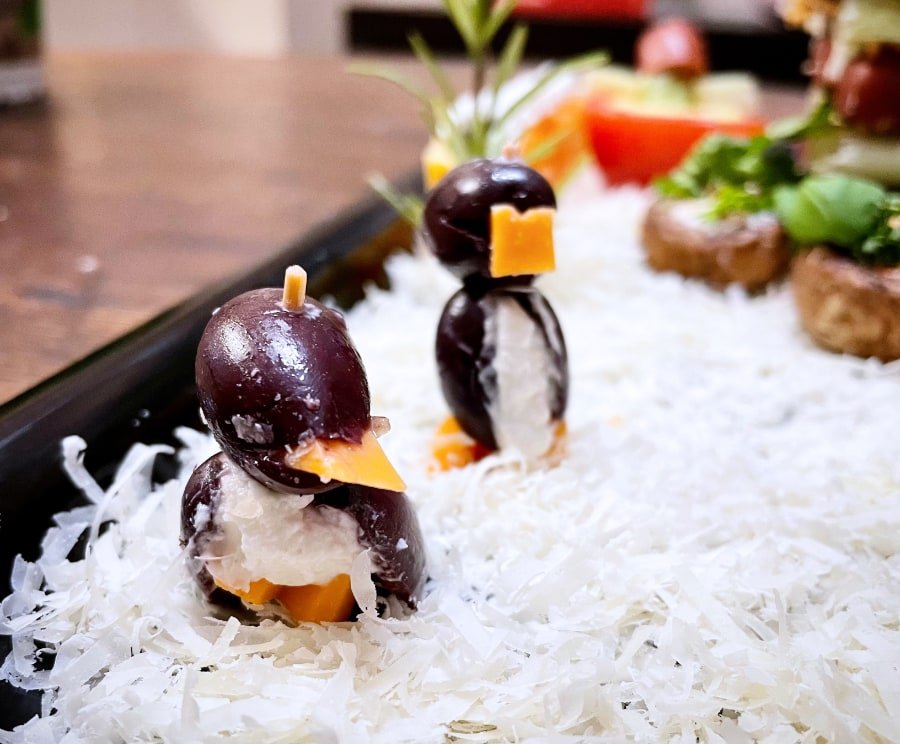
- Penguins: [Kalmata olives filled](kalmata olives with mortar (above), cheddar cheese (for feet and beaks)
- Potted plants: Mushroom caps filled with mortar (above), a dusting of cajun seasoning and fresh herbs.
- Hot tub dip: Roma tomato half (hallowed out) filled with tofu cheese dip with person made with celery and pepperoni top connected with toothpicks.
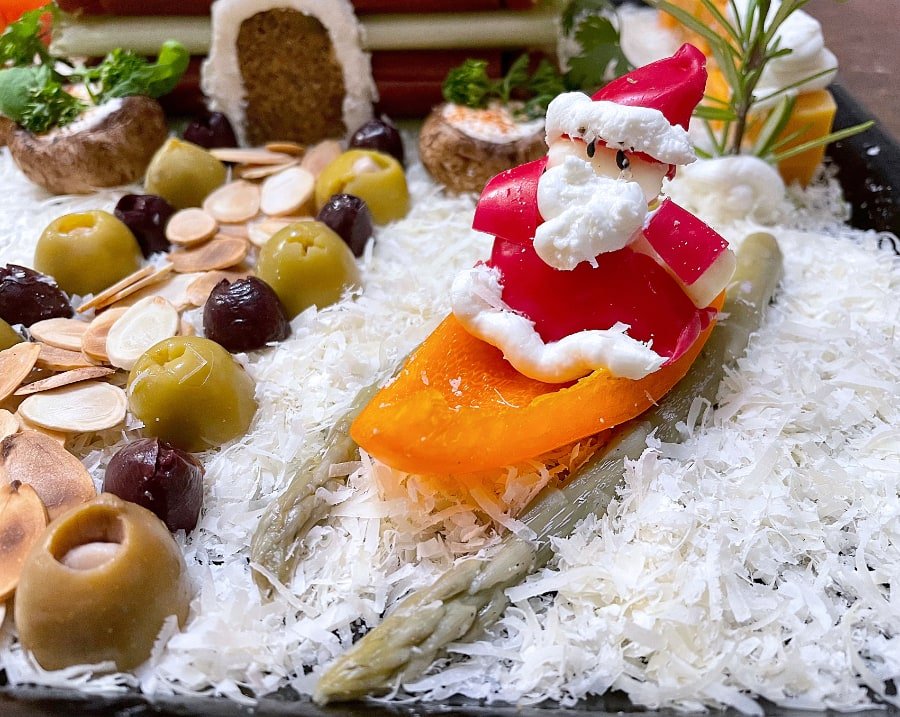
- Sled: Slice of orange bell pepper with pickled asparagus for base.
- Santa: Babybel cheese, mortar (above) and black sesame seeds (*Wax from Babybel used to make the suit.)
- Pine trees: Fresh rosemary sprigs and mortar for snow.
- Walkway: Toasted sliced almonds, lined with green and black olives.
- Snow: Grated parmesan cheese.
Items Served on the Side:
- Toothpicks/skewers
- Nut and seed crackers and/or sliced keto bread
- Sliced pickles
- Cut veggies
- Extra tofu cheese dip and goat cheese mortar
- Any extra cheese cubes or sliced sausage/pepperoni left from building.
I provided all of the above ingredients to make it easier for people to deconstruct and eat the house in appealing combinations.
Ideas for Futre Charcuterie Chalets
Here are a couple of ideas I would have liked to try but wasn't able to do this year:
- Well: Little cup surrounded by tiny cheese bricks, topped and surrounded with mortar snow, filled with blackberry bayleaf jam.
- Snowman: Bocconcini or burrata snowballs, green onion scarf, prosciutto hat and carrot sliver nose.
- Veggie Trees: Broccoli crowns. (*I actually bought the broccoli to do this but totally forgot about it.)
There are tons of other ways to go about building your own charcuterie chalet. One must only search for it on Instagram or Pinterest to find lots of inspiration, but be sure to also be inspired by what foods you already have in your fridge. I'm a firm believer in using what you have because it makes it a lot easier when you don't have to rush out to buy specific ingredients. Some things you can make yourself, some things you can buy to save on prep time. Do what makes sense for you and your guests.
Challenges of the Building the Charcuterie Chalet
While this was a fun recipe in concept, it is a LOT harder to build a sturdy structure because the main mortar just doesn't harden as much as royal icing does, whether it's low-carb or not. It simply would not have stuck together if I hadn't used toothpicks at the corners. I also stuck in angle tooth picks to prop the roof pieces up as they would probably of slid off as the dish came to room temperature again. When working with the cream cheese mortar, you have to work quickly and deliberately so you can get the structure back into the fridge to solidify while you work on other elements. This made it a lot more challenging.
While I really liked the look of the cracker roof, one down side is that the cream cheese mortar eventually seeps into it making the cracker pieces soft and gross later on, and basically inedible. If I were to do it again, I would probably use celery stalks for the roof, connected with toothpicks, making it nicer to eat later on. Speaking of eating the structure, the one other down side to making a charcuterie chalet is that you pretty much need to eat it within the first 2 hours of displaying it for it to be food safe. That means that any guests who are late to the party will only get to see the crushed ruins of your hours of work. Gingerbread houses are more of a dessert and don't have the same food safety issues. And with regard to food safety, the charcuterie chalet you design will have to be small enough to fit in your fridge until you're ready to serve it (yes, the same fridge containing all the other party foods).
Would I make it again? Yes, but I would definitely stick to a smaller build for smaller parties. I wouldn't want to have to sacrifice my fridge space if we had to provide for a larger party.
Are you going to attempt building a charcuterie chalet? If so, be sure to share your experience in the comments, or even better, tag me in your Instagram pics so I can see your creations! :)